【Moho Dev Story】Discarding 1,000 Lines of Math for Pure Intuition: The Birth of 3D Prop & Environment Builder “FoldWeaver 3D”
1. Introduction: Beyond 3D Character Action
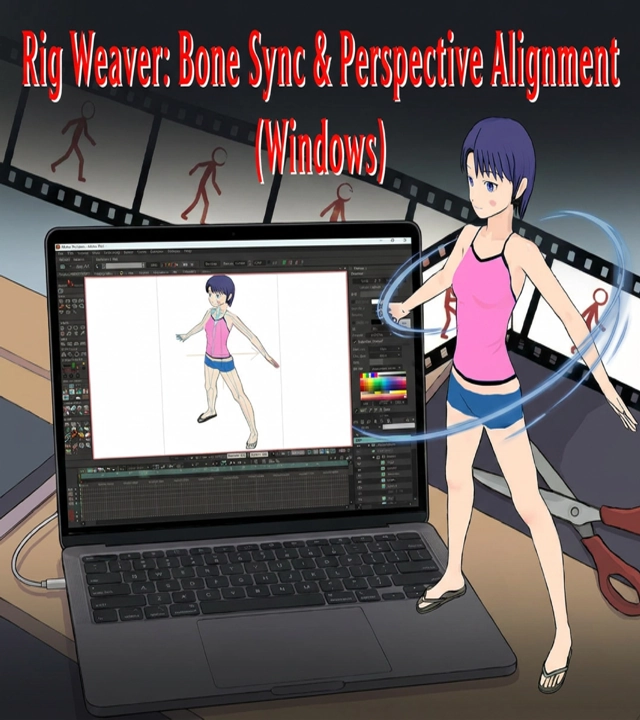
With the release of our Moho rigging tool “RigWeaver”, animators could finally puppeteer 2D characters with extreme high- and low-angle perspective foreshortening in full 3D space.
Yet, as dynamic characters leaped through space, we immediately slammed into the next giant wall:
“…How on earth are we supposed to build matching perspective backgrounds and 3D props inside Moho without losing our minds?”
If you cannot construct environments quickly, 3D character action falls flat. “Let’s create a tool that lets artists fold 3D papercraft environments directly inside Moho with pure hand-drawn intuition.” That decision was where everything began.
2. The Failure of “HoldWeaver”: 1,000+ Lines of Script & Coordinate Hell
Our first attempt was a target-snapping tool named “HoldWeaver”.
- Place a “target reference marker” in 3D space.
- Pick 2 points on your source face and 2 points on the target marker.
- The script automatically calculated world coordinates, parent local matrices, and Euler rotation angles, snapping the face to the hinge.
On paper, this seemed like the textbook mathematical approach. In practice, it turned into an endless development nightmare.
【The Struggles of HoldWeaver】
・Complex selection caching for source and target point pairs
・Convoluted matrix multiplications accumulating parent group scales, rotations, and Z-translations
・Floating-point precision drifts multiplying deeper into layer hierarchies
・Script codebase ballooned past 1,000 lines...
Worst of all: “It was miserable to use.”
“Create target ➜ Select face ➜ Click snap ➜ Tweak angle…” The friction completely halted creative flow. Rapidly producing background scenes and props was out of the question.
3. The Copernican Shift: “Bring it to Center First, Then Move”
“The math explodes and drifts because we’re trying to snap directly to arbitrary targets.”
The moment that realization struck, we made a radical leap:
We threw away the complex world coordinate tracking:
- Snap the 2 selected edge points flush to the World X or Y axis (auto-establishing the origin and hinge axis).
- Use Moho’s native Transform Layer tool to rotate and fold like real origami paper.
Instantly, 1,000 lines of coordinate calculations vanished, and coordinate drift dropped to absolute zero.
Furthermore, by strictly designing the tools as one-shot “Buttons” (keeping active selection tools intact) mapped to keyboard shortcuts, animators can rapidly construct entire 3D rooms by simply tapping shortcuts with point tools in hand. Thus, “FoldWeaver 3D” was born.
4. Not Just Backgrounds: Unstoppable Speed for 3D Prop Modeling
FoldWeaver 3D’s true power goes far beyond rooms and streetscapes.
It is extraordinary for modeling animation props such as desks, chairs, books, treasure chests, home appliances, and vehicles.
Beyond unfolding from a flat 2D net, we discovered the “Duplicate Layer ➜ Clear Content ➜ Draw New Face ➜ Shift+A Fold” sequential duplication technique. This allows animators to endlessly expand complex 3D props while maintaining a completely flat layer hierarchy without nesting deep group layers.
5. The Styling Breakthrough: Drawing Lines and Shadows Flush on 3D Surfaces
Moho includes native 3D extrusion and rotation features. However, every animator encounters the same frustrating roadblock:
- “It’s 3D, but I cannot draw clean window frame lines or panel strokes where I want.”
- “I cannot paint stylized anime cast shadows or highlights with custom fills.”
Extruded 3D objects strip away the artistic control needed for stylized 2D anime linework and aesthetic cel shadows.
💡 The Transform Inheritance Magic
FoldWeaver solves this effortlessly:
【Placing Lines & Shadows on 3D Faces】
① “Duplicate” (Duplicate Layer): Duplicate target face layer (inherits exact 3D position & angles)
② “Clear” (Delete All): Delete all points to make the layer empty
③ “Draw” (Vector Art): Draw new frame lines or shadow fill shapes directly on its local plane
④ “Offset” (Z-Nudge): Nudge slightly forward in Z to sit flush on top!
Because you draw directly on the inherited local coordinate plane, you retain 100% of Moho’s rich vector strokes, variable line width profiles, and gradient fills with zero distortion.
💡 Overcoming Moho 3D’s Ancient Curse: Internal Line Artifacts & Seams
Furthermore, this approach instantaneously solved a notorious flaw in Moho’s native 3D extrusion: the internal center strokes that stay visible and expose unwanted intersection seams across top and side faces.
“Treat 3D not as the final rendering result, but as a rigid motion anchor, and overlay a pristine 2D canvas on top to 100% conceal and eliminate all internal artifact lines.” This mindset shift yielded flawless hand-drawn cel-look 3D props.
6. The Birth of “Shift+O”: Unbreakable 3D Centroid Precision Snapping
Yet, pushing prop modeling to its limits revealed the ultimate 3D friction: “Lost Pivot Point Syndrome.”
When trying to rotate a prop or add an emblem badge to a specific corner, an off-center origin pivot causes parts to fly across the screen upon rotation.
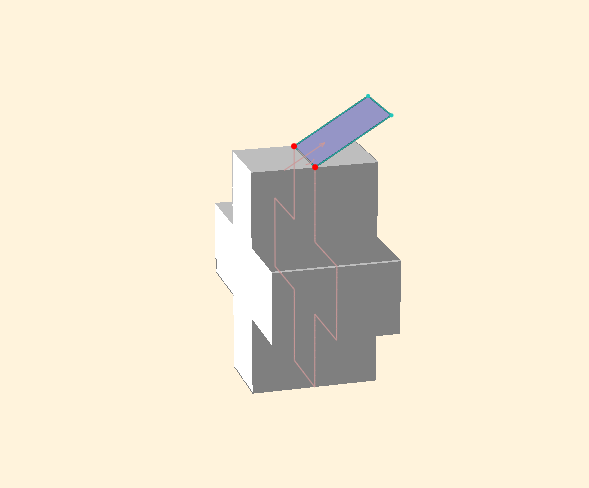
To solve this forever, we created `FoldWeaver: Reset Origin` (`Shift+O`).
【Universal Multi-Target Centroid Precision Snapping】
・Click 1 corner vertex ➜ Snaps that corner directly to World Origin (0,0,0) instantly!
・Select 2 edge points ➜ Snaps the true 3D midpoint to World Origin (0,0,0) instantly!
・Select scattered points across layers ➜ Snaps their true 3D centroid (average center) to World Origin!
No matter how you select points, the underlying mathematical engine calculates 3D rotations and Z-depths to summon your chosen target flush to World Origin (0, 0, 0) with pinpoint precision.
This unlocked the ultimate hand-drawn detail workflow:
- Select a prop corner and press
Shift+O - Orbit work camera to your preferred angle
- Create a new vector layer and reset Position XYZ to
(0, 0, 0)(snaps flush to corner facing camera) - Draw emblems, bolts, or badges directly from the front!
7. Unity with Mesh & Pin Weaver 3D: Fusing 3D Anchors with 2D Silk, and the 6 Unified Keybinds
The story culminated in the complete unification with sister tool “Mesh & Pin Weaver 3D.”
① Mastering Curved Surfaces: MeshWeaver 3D (Shift+W)
“Flat surfaces can be folded with FoldWeaver. But what about curved surfaces like cylinders and pipes?”
The answer was MeshWeaver 3D, which projects and auto-bakes a camera-facing 2D Smart Warp onto 3D curved surfaces.
Because Shift+O resets any prop’s local centroid to (0, 0, 0), positioning a projection guide on a cylinder with radius 0.5 is as simple as typing “0.5” into Position Z.
② Rescuing Fluttering Ribbons & Accessories: The Hidden Masterpiece PinWeaver 3D (Shift+P)
Yet, one final challenge remained:
“MeshWeaver covers rectangular faces and cylinders. But what about fluttering scarves, ribbons, belts, shoulder badges, and joint-tracking accessories on moving characters?”
Rigid 4-point quadrilateral meshes cannot handle organic cloth flutter or free-point accessory tracking.
Thus was born the true hidden masterpiece of the Weaver series: PinWeaver 3D (Shift+P).
The mathematical breakthrough lay in its engineering design: Zero-Length Pin Bones (fLength=0) with Broad Field Strength (fStrength=6.0).
Acting as pure 2D coordinate anchors on screen without rotational axes, pin bones apply a silky-smooth, rubber-like organic flexi-binding to hand-drawn illustrations between multiple pins.
Simply select 3D vertices and press Shift+P (taking just 1 second). Without switching drawing tools, hand-drawn scarves flutter dynamically in the wind and shoulder plates rigidly track violent 3D action. Fusing rigid 3D “anchors” with flexible 2D “silk” was realized at last.
【Weaver Series 6 Unified Keybindings Highway】
・Shift+M : Add Marker & Establish Local Origin (Add Marker)
・Shift+A : Fold Planes into 3D Assemblies (Align)
・Shift+C : Clear All Point Selections (Clear All Points)
・Shift+O : Reset Origin to Centroid & Summon to World Center (Reset Origin)
・Shift+W : Project Front Mesh Textures & Shadows (MeshWeaver)
・Shift+P : Auto-Bake Pin Bone Rigs from 1–10 Points (PinWeaver)
With these 6 keys aligned under the Shift+ prefix, 3D prop assembly, corner detailing, curved shadow painting, and organic prop pinning are completely operated with your left hand on the keyboard.
8. Conclusion: Built for the Joy of Animating
The bitter failure of “HoldWeaver” paved the way for something far better: the pure intuition of FoldWeaver 3D, the universal precision of Shift+O, and the dual projection mastery of Mesh & Pin Weaver 3D.
- RigWeaver (3D Character Action & Auto-Rigging)
- FoldWeaver 3D (Paper-Craft Prop/Environment Modeling & Front Detailing)
- Mesh & Pin Weaver 3D (Dual Projection Engines for Curved Meshes & Organic Pin Bones)
With these powerful tools united, 2.5D animation in Moho has entered a new era: faster, freer, and infinihttps://webftp-sv8140.xserver.jp/sentakuclip.net/public_html/jetb/wp-content/uploads/2026/08/FoldWeaver/Mesh&Pinweaver/Manual.ziptely more enjoyable.
English
Weaver/English.zip
FoldWeaver/Manual.zip
Mesh&Pinweaver/Manual.zip
Weaver/LayerWeaver/Templates.zip
Weaver/RigWeaver/manual.zip
Weaver/RigWeaver/Templates.zip
Weaver/MotionWeaver/manual.zip
Weaver/MotionWeaver/Templates.zip
Japanese
Weaver/Japanese.zip
FoldWeaver/マニュアル.zip
Mesh&Pinweaver/マニュアル.zip
Weaver/LayerWeaver/マニュアル.zip
Weaver/LayerWeaver/Templates.zip
Weaver/RigWeaver/マニュアル.zip
Weaver/RigWeaver/Templates.zip
Weaver/MotionWeaver/Templates.zip
LayerWeaver
通常価格
0
円商品紹介
RigWeaver
通常価格
0
円商品紹介
MotionWeaver
通常価格
3,***
円商品紹介
関連情報
洗濯クリップ |簡単に使えておしゃれで可愛い着せ替えて遊べる洗濯ばさみ
誰でも簡単に幸せになれる。家事や子育て、介護が楽しくて簡単に思えてくるアイテムの企画製造販売をいたします。洗濯クリップは引っ張るだけで簡単に洗濯物を干して取り込める、おしゃれで可愛い着せ替えて遊べる洗濯ばさみ。耐候性があってボロボロになりにくいから壊れて捨てた洗濯ばさみと交換してハンガーを長く使うことができます。商品展示用に帽子や写真などを吊るしたり、ハンカチクリップとしてバッグやスカート、ズボン、お子様のランドセルに取り付けたりなど幅広くご活用していただけます。
| 屋号 | 洗濯クリップ |
|---|---|
| 住所 | 〒273-0011 千葉県 船橋市湊町2-4-5-6 |
| 電話番号 | 047-434-8589 |
| 営業時間 | 平日9時~17時 定休日:土・日・祝日 |
| 代表者名 | 橋本 拓也 (ハシモト タクヤ) |
| info@sentakuclip.net |